Working with objects
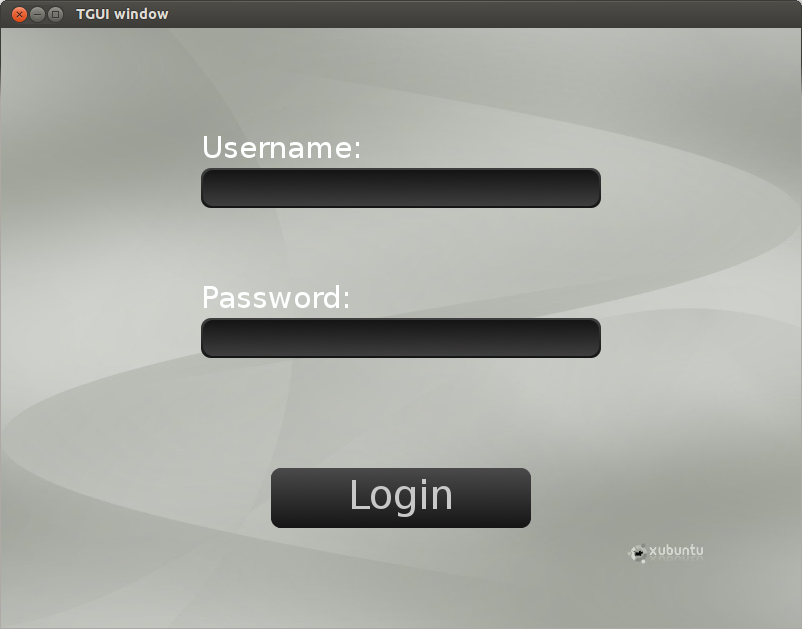
In this tutorial, you will learn how to make a login screen like in the screenshot below.

To create an object, you will have to add it to the window. The add function works with templates so that you can create any kind of objects, even your own custom ones. The name you pass to the add function is a way to access the object later, but it is not really needed in most situations.
tgui::Picture* picture = window.add<tgui::Picture>("BackgroundImage");Now that the object (in this case a picture) is created, you can set it up.
picture->load("myBackgroundImage.png");
picture->setSize(800, 600);
We are also going to create an edit box. The code is similar to creating the picture.
tgui::EditBox* editBoxUsername = window.add<tgui::EditBox>("Username");
editBoxUsername->load("TGUI/objects/EditBox/Black");
editBoxUsername->setSize(400, 40);
editBoxUsername->setPosition(200, 140);
We could load the second edit box in exactly the same way, but I’ll show you how to copy objects.
All you got to do is call copy instead of add.
As this is an edit box that contains a password, we will set a password character.
tgui::EditBox* editBoxPassword = window.copy(editBoxUsername, "Password");
editBoxPassword->setPosition(200, 290);
editBoxPassword->setPasswordChar('*');
The rest of the objects are created in a similar way and I am not going to explain every line.
Below you can find the code to create all the objects inside the login screen.
Take a moment to read through it to make sure you understand everything.
void loadObjects( tgui::Window& window )
{
    // Create the background image
    tgui::Picture* picture = window.add<tgui::Picture>();
    picture->load("myBackgroundImage.png");
    picture->setSize(800, 600);

    // Create the username label
    tgui::Label* labelUsername = window.add<tgui::Label>();
    labelUsername->setText("Username:");
    labelUsername->setPosition(200, 100);

    // Create the password label
    tgui::Label* labelPassword = window.add<tgui::Label>();
    labelPassword->setText("Password:");
    labelPassword->setPosition(200, 250);

    // Create the username edit box
    tgui::EditBox* editBoxUsername = window.add<tgui::EditBox>("Username");
    editBoxUsername->load("TGUI/objects/EditBox/Black");
    editBoxUsername->setSize(400, 40);
    editBoxUsername->setPosition(200, 140);

    // Create the password edit box (we will copy the previously created edit box)
    tgui::EditBox* editBoxPassword = window.copy(editBoxUsername, "Password");
    editBoxPassword->setPosition(200, 290);
    editBoxPassword->setPasswordChar('*');

    // Create the login button
    tgui::Button* button = window.add<tgui::Button>();
    button->load("TGUI/objects/Button/Black");
    button->setSize(260, 60);
    button->setPosition(270, 440);
    button->setText("Login");
}
Previous: Starting with TGUI
Next: Handling callbacks